Does your little one love cutting and sticking and getting messy?
Engaging your child through creativity has unbeatable benefits, combining the joys of play with developmental benefits like motor skills, emotional literacy and sensory exploration.
In CBeebies' show Monster Makes, Rebecca is joined by Murphy to create some fun makes you can do at home. See how they make a paper plate dinosaur in this easy, fun craft.
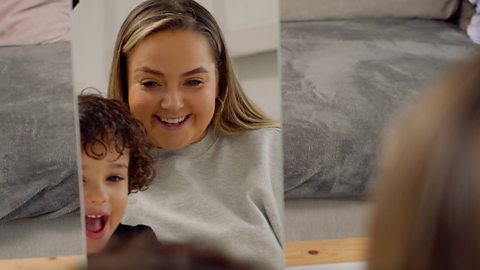
Hey, I'm Rebecca from Monster Makes on CBeebies.
When I'm not busy working, I've got my own little munchkin running around at home. I'm sure you'll know what I mean when I say she keeps me on my toes.
Something that no one can ever prepare you for is just how much entertaining little ones need. The good news is, the CBeebies Parenting website has loads of information and ideas for you to try with your preschooler at home.
Take a look at this paper plate dinosaur we made on Monster Makes. Honestly, it couldn't be easier.
Let's get monster making!
It's a paper plate dinosaur. For this, we'll need a paper plate, paint, a cardboard tube, some scraps of card, and stickers.
Start by drawing on one half of the plate. We need a neck…
Ooh, I love, love, love a long neck.
…A head and tail. Now let's use monster magic to cut them out.
Yeah. Monster cutting.
Cutting is definitely something us big kids take for granted and something little kids can find tricky, but it's really important for helping to develop hand-eye coordination, fine motor skills, focus, confidence, and independence. And it's one of those skills that requires the use of both hands.
Just make sure you're always with them when they're cutting. And don't leave the scissors laying around, no one wants their little one wearing their own haircut until it grows out… if you know what I mean.
Let's stick this dino together.
Sticky, sticky, stick stick!
Let's use a cardboard tube for the legs.
There you go, Rebecca.
Thanks, Murphy. Now, carefully cut the tube in half and then make two slits on each end.
Oh, yeah! Monster magic cutting.
We can glue on triangle scraps of card for dinosaur spikes. This is a good chance to talk about the four main shapes: circles, squares, rectangles, and triangles. Why not ask which one would work best for the dinosaur's sharp spikes?
Ooh, spiky! We can call it spikysaurus!
I like that name. Now let's paint spikysaurus any colour you like.
One purple spikysaurus coming up.
Once the paint is dry, stick on some stickers for decoration.
Ooh, spotty dotty.
If you don't have stickers, you can always paint these on. One roarsome spikysaurus. A paper plate, cardboard tube, paint and stickers simply turned into a dinosaur.
Something like this can help your little one with fine motor skills, hand-eye coordination, communication, and decision making. Try asking them what type of dinosaur to make, what colour to paint it, and even what to call it.
Because all of us need a name. Isn't that right, Margaret? And Patsy. Dave. Emily. Nick. Oh, Richard.
You will need
A paper plate
Coloured paint
A pen or pencil
A cardboard tube
Scissors
Glue stick
Scraps of card
Round stickers (optional)
Method
1. Draw, on one half of the paper plate, a dinosaur neck, head and tail.
2. Cut these out with scissors, plus the other half of the paper plate.
3. Stick the head and neck and tail to the complete half of the paper plate using glue stick.
4. Cut the cardboard tube in half, and add two slits on each half to hold it to the body.
5. Attach the cardboard legs to the body.
6. Stick triangle scraps of card to the dinosaur's body all the way from the head to the tail.
7. Paint the whole dinosaur whatever colour you'd like.
8. Decorate the dinosaur using stickers and add eyes using white and black circle stickers - or paint the spots and eyes on.
What little ones can learn
Fine motor skills, hand-eye coordination and independence are three important skills that can be learnt gradually through cutting and using scissors carefully. Using two hands simultaneously is a very beneficial skill to develop through this kind of activity.
You can speak to your little one about four different shapes while cutting out the dinosaur's spikes - triangles, circles, squares and rectangles - helping them recognise these shapes more easily. You can ask your child what shape they think would work best for the dinosaur's spikes. See whether they can make the association that spikes look like triangles.
Lastly, this can help with developing decision-making skills. Give them the option to choose whatever colour they'd like to paint the dinosaur. They may even decide on a stripey or spotty pattern!